Home electrical repairs are a common and essential part of home maintenance. Whether fixing an outlet, replacing a light switch, or dealing with a circuit breaker issue, having a basic understanding of electrical repairs can save you time and money. However, safety should always be a top priority when working with electricity.
This guide will cover the types of electrical repairs and the tools you’ll need, provide step-by-step instructions for common repair tasks, discuss safety measures, and advise when to hire a licensed electrician.
Before we dive into the specific repair tasks, let’s outline the common types of home electrical fixes you will encounter:
Repair or replace malfunctioning electrical outlets.
Address issues with light switches, such as flickering or not working.
Install or replace light fixtures, including ceiling fans.
Reset tripped circuit breakers to restore power to an area.
Address problems with electrical wiring, such as exposed wires or damaged cables.
Troubleshoot and repair GFCI outlets and circuit breakers.
Add new electrical outlets or light switches where needed.
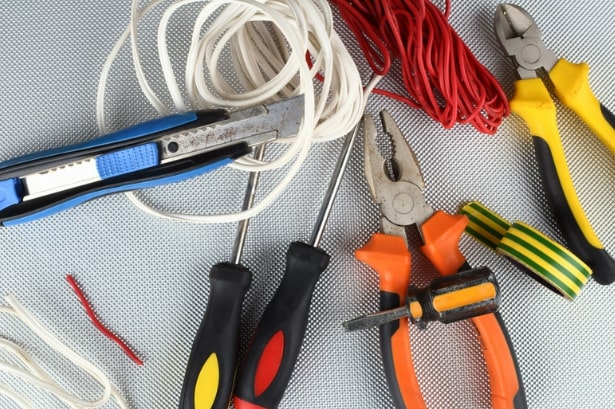
Having the right tools is necessary for safe and effective electrical repairs. Below are some essential tools for home electrical fixing, along with their purposes:
Tool | Purpose |
Voltage Tester | Checks for the presence of electrical current in a circuit. |
Pliers | Used for gripping, bending, and cutting wires. |
Wire Strippers | Removes insulation from wires to expose the conductor. |
Screwdrivers | Tighten or loosen screws on electrical devices and fixtures. |
Circuit Tester | Tests circuits to ensure they are safe and correctly wired. |
Wire Nuts | Securely connect wires together. |
Non-Contact Voltage Detector | Detects the presence of live electrical wires without direct contact. |
Electrical Tape | Insulates and secures wire connections. |
Fish Tape | Helps route wires through walls, conduit, or other tight spaces. |
Now, let’s explore the step-by-step instructions for common electrical repair tasks.
Armed with the right tools, it’s time to dive into the essential steps that will not only yield optimal results in your repairs but also ensure your safety:
Certain home electrical fixes can necessitate the expertise of a licensed electrician, but do-it-yourself enthusiasts can undertake numerous electrical tasks. Prioritizing safety is paramount, and you’ll be amazed at what you can achieve in maintaining and enhancing your home’s electrical systems.
Save time by determining which electrical circuits correspond to specific receptacles in your home. Create a diagram or label the information within the circuit breaker or fuse box. These guidelines prioritize your safety and the efficiency of your electrical repairs, ensuring you can confidently handle electrical tasks within your home.
While many electrical repairs can be safely handled as DIY projects, some situations call for the expertise of a licensed electrician:
When to Hire a Licensed Electrician | Description |
Complex Wiring Issues | If you have extensive wiring problems or need to rewire a room or the entire house, it’s best to hire a professional. |
Frequent Circuit Breaker Tripping | If circuit breakers repeatedly trip, it could indicate a serious problem that requires a professional’s assessment. |
Electrical Panel Upgrades | Upgrading your electrical panel or service requires professional installation. |
New Circuit Installation | Hiring a professional is safer if you have safety concerns or don’t feel confident in your electrical repair skills. |
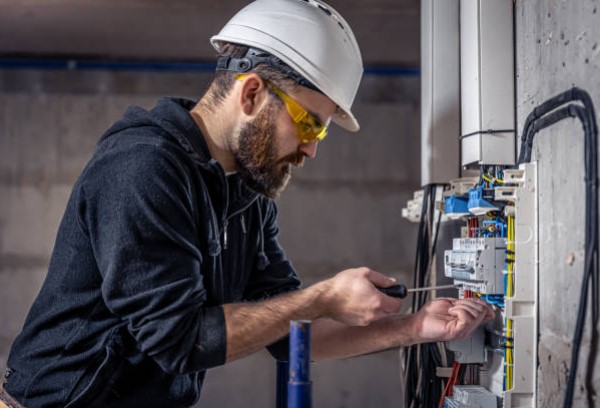
Understanding how to perform common home electrical fixes is valuable, but safety should always come first. You can tackle many electrical repair tasks by following the right procedures and safety measures.
Don’t hesitate to contact a licensed electrician when facing complex or potentially hazardous home electrical repairs – and Mountain Point Electrical Inc. is an excellent resource for such expertise.
Remember, the safety of you and your home, as well as the integrity of your electrical system, should never be compromised. Contact us today.
While a multimeter can serve this purpose, a non-contact voltage detector is safer and more convenient for quickly identifying live wires without direct contact.
If you find damaged wiring, it’s essential to repair or replace it. Use wire strippers to remove the damaged portion and connect the new wire securely.
No, it’s extremely dangerous to work on live electrical circuits. Always turn off the power at the circuit breaker before repairing any electrical components.
Conduct an annual check for loose connections, exposed wires, or signs of overheating. If you notice any problems, address them promptly.
Overloading the circuit with too many devices is a common cause of frequent tripping. If this happens, consider redistributing devices to different circuits or adding new circuits if needed.